Sunday, November 27, 2011

And Now It's Time to Say Goodbye

The weather has changed quite a bit in Mendocino County - it's much colder in the morning and evening.  Darker too (thank you, daylight savings).  There's a noticible chill in the air even when the sun is out, letting us know we are most definietly into fall, on our way to winter. The timing feels appropriate for the intern program to come to a close.

It's crazy how fast 6 months went by. 

Eric was the first to go.  He left a number of weeks ago for Bali.  (I know, we feel real sorry for him ;)  He found an awesome job in Ubud, using his architecture background to design and naturally build a meditation-permaculture-spiritual retreat/oasis.  They needed him sooner than later, so off he went.

Then, Brittany left for Atlanta. She went home for a long Thanksgiving break.  Though, she will be back in CA to attend a Permaculture Teacher training in December.  After that, she'll join Eric in Bali.

Cassie left last week.  She's heading back home to Carmel Valley.

Next on the chopping block was David.  He left soon after Cassie, on his way back to Maine for Thanksgiving & Christmas.  In the New Year, he'll be starting a building internship at Yestermorrow.

And then there's Vaughn.  He's been MIA for a number of weeks, working in solar and house-sitting in Ukiah.  He has plans to head to Nicaragua in December for the Power to the People event, where they'll be installing solar panels for communities without electricity.  Karen, our Workshop Director, will also be attending.

That leaves me and Brandon.  Since home is not too far a way for us (the bay area) with no immediate plans (a few things brewing), we're a bit more flexible.  I think it will come down to how long we can handle the chilly nights in an uninsulated cob building.  Bring on the long johns ....

So, that's it for the 2011 interns at SLI.  I think I can speak for us all when I say our time here has been inspiring, challenging, fun and educational.  We wish the next round of interns the same and more (and hope they finish our Hybrid House.)  So, until April 2012 ... this is the Intern Class of 2011 signing off.  See you next year!

Interns with Joel Salatin (woot!) 
Moondance

- Kathryn, Brandon, Brittany, Eric, David, Cassie & Vaughn

Thursday, November 10, 2011

The Hybrid House Project

You know I had to save the best post for last.  Well, this won't be the last post, but just about.  We've come to the end of the intern program, but I'll fill you in on all that later.  This post is about the coolest project the interns worked on this year.  It is called: The Hybrid House.

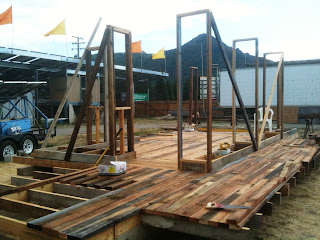
The initial foundation + stick frame

What's a Hybrid House?  It is a small, naturally built structure utilizing various building modalities and materials, such as cob and straw bale.  It was built using completely natural (dirt, sand, straw) and recycled (wood for stick frame, metal roof, etc) materials.
 
It started out as Cassie's idea.  The interns had to move the foundation for the tee-pee to the south lawn, right across from the intern village.  It was a sizable foundation, and with a few tweaks, would be suitable for a building.  This all happened right around the time of the Straw Bale Building Intensive.  We wanted to expand on the 2 day course and use this new foundation to actually build something that would stay there and be finished, as opposed to setting up the framework and then tearing it down (which is what happens every time that course is held.)

There wasn't enough time before the course started to make it happen, but that didn't deter our ever-eager interns.  They all put their heads together to design the most energy efficient unit they could, and were determined to find a way to make it come to life.  And come to life, it did.


Once things got rolling, Eric stepped in to spearheaded the project.  He studied architecture in undergrad and has quite a bit of hands-on natural building experience.  The project began in June, and after 5 months of hard work, the exterior is 95% done. 

Some of it's features:
This house was designed to be comfortable in the winter by retaining and maximizing heat.  Currently there are no buildings on site that do this well - many were designed to withstand the hot summer and remain cool (such as The Real Goods store, and Pachamama), but they don't do so well in the winter.  I'm pretty chilly now in Pach and it's only November.

The hybrid house has a bunch of windows on the south facing wall to allow maximum sunlight during the winter.  The sunlight will enter, heat up the earthen floor, and the straw bale insulation on the north and west walls will hold the heat.  The south awning extends down and blocks the sun rays from April through August, keeping it cooler during the summer months.  The east wall has a window to help wake up the room and warm it up in the morning.

Brittany cobbing the north facing, straw bale wall

The roof itself is pretty unique as well.  It was designed with a valley down the middle of the building to allow for maximum rainwater catchment. Rain will collect in the middle and run off towards the lower corner.  Wind will also move through it effortlessly - the "dip" in the roof allows for the NW and SE winds to pass over it easily.  The roof is made out of recycled, corrugated metal - not easy material to work with.


The south facing wall - lots of windows to draw in the winter sun

Inside, there is room for a kitchen sink and a sleeping loft was built to maximize space.

Inside: what will be the kitchen

I've included a few photos, but to see all of them you can check them out on our Hybrid House Album on Facebook.

Unfortunately, we weren't able to finish this project during our internship (so close!) , so 2012 interns .... you have a project ready and waiting for you!

Tuesday, October 18, 2011

Aquaponics

This past weekend SLI hosted an Aquaponics course, led by Max Meyers from NorCal Aquaponics. It was one of the most packed classes I've seen - every intern + a full classroom of students!  Looks like word is getting around about what an incredible growing system Aquaponics is.

Aquaponics merges Aquaculture, the cultivation of fish/aquatic animals, with Hydroponics, the growing of food in water (no soil).  The result is a closed loop system generating one of, if not the most, efficient and sustainable food production systems in the world.

How does it work?  Simply speaking, with the help of numerous bacteria living symbiotically with the fish in the tank, the fish byproducts (ammonia, excrement), are digested by the bacteria and ultimately converted into nitrates - nutrients plants need to grow. The plants absorb the nitrates, which also cleans the water for the fish.  A lovely system living in harmony. It's incredibly energy and water efficient too - much more so that conventional farming.

Since this system doesn't require soil, it can easily be implemented in urban areas - and with the demand of food ever increasing and prices going up, it is an excellent way for families with limited backyard growing space to produce their own food.

Bok Choy grown via Aquaponics

What I found fascinating is that this growing method was used centuries ago ... by the Egyptians!  They used natural water ways thought, not water tanks or a controlled environment.  But it was the same principle.  With our advancements since then, we can now have much more control over the process, managing water pH levels and nutrient density, and get even more bounty from our (relatively minimal) efforts.

Because of it's flexibiilty and efficiency, there's no telling how far we can take it - Max shared photos and videos with us about setting up aquaponics in skyscrapers, building the grow beds vertically, or growing in typically unused spaces such as flat rooftops or warehouses (my old apartment in SF would be perfect).  Imagine having your own "farmers market" upstairs? 
Plants up top, fish tank below

Vaughn has been super excited about Aquaponics since he discovered it a few months ago and got SLI a "starter kit".  We have everything that we need to set it up.  Now that all the interns have taken the course, it's next on our to-do list!

Wednesday, September 28, 2011

Seed Saving

With all of the produce we've come across, be it from our own garden, our neighbors, or from the heirloom expo, we've begun saving seeds of the best fruits, veggies and herb.

Most of the seeds have been taken out of the fruit/veggie, rinsed off (if necessary - think; melon seeds) and laid out to dry.  Once dry, we wrap them up and store in a cool spot.

Can you see the white layer of mold in the jar?
David started experimenting with the tomato seeds.  He read that in order to adequately breakdown the slimy outter layer of the tomato seed (don't know the techincal term so "slimy" will have to do), you're supposed to let them sit in water and grow a layer of mold on the top - the mold will "eat" off the outer layer. This mimics nature - generally, a tomato growing in the wild will vine ripen, fall, rot, then germinate again the following spring from seed.  It would be interesting to compare how seeds harvested this way fare compared to those simply rinsed and dried. 

We cleared off a shelf in our kitchen and it's been deemed the "seed saving shelf" - there are seeds from tomatos, melons, peppers, and eggplant so far.  Seeds from cilantro, valerian, calendula, artichoke have also been harvested - but these dried on the plant. 

It pretty cool that we're able to take the seeds we've gathered from our time here and will plant them wherever we all end up next spring ... taking some of SLI and our experience with us to our next destination - quite literally!

Friday, September 23, 2011

Grapes Galore

For those of you that have visited SLI, you may have noticed that the Oasis is covered with grape vines.  They create a shaded canopy, cooling us when it's blazing in the summer and providing a bounty of grapes - more than we know what to do with.

Grapes in the Oasis

Most of us have been eating them right off the vine - picking a bundle and munching on them between meals. even having them for dessert.  They're pretty seedy, but we don't mind - we crunch right through them.  Some have even begun drying into raisins!  The best are the semi-shriveled half grape, half raisin - they're extra sweet and just the slightest bit chewy.

So, what do we do with all these grapes, you ask?  Juice em!

David & Brandon spent half a day harvesting 2 huge coolers worth of grapes to bring up to our friend Jini's house for juicing.  She has an apple press, and we heard that works just fine on grapes, too.

Brandon mid-harvest (I told you they shade well!)

One of the 2 coolers filled with grapes for juicing

We decided to make an evening out of it, as Jini lives in Redwood Valley, a bit north of Ukiah.  So Brandon, David, Vaughn, Mimi and I rolled up there, grapes and empty bottles in tow, to make some juice as well as dinner.

David and Mimi led the pressing while B and I manned the kitchen.  In 2 hours time, we pumped out approximately 9 gallons of grape juice and 10 pizzas.  Now that's teamwork.

The grape juice is so good but it's sooo sweet!  We're talking syrup-sweet.  I'm sensitive to sugars and after 3 large gulps, I could feel my heart rate amp up.  Vaughn had a hefty cupful and started to felt shaky.  Talk about a sugar rush.  We've found the best way to consume is to cut it with some sparkling water.

So refreshing in the hot summer sun

What does one do with 9 gallons of grape juice?  Make jelly, of course!


Wednesday, September 21, 2011

Family Dinners

One of my favorite things about living in community is sharing meals.  Or, as I like to call it, family dinners. We're essentially our own little family, right?

We started out having group dinners/potlucks every other Tuesday, but that's shifted a bit.  Now we'll plan it on occasion, but it tends to happen spontaneously, when a few of us are in the kitchen making different dishes. We'll join forces, share our respective dishes and end up with a collective feast versus a simple meal for just one or 2.  

This week our theme has been using the outdoor cob oven.  We love that thing.  It hasn't been used much since early spring, but we're bringing it back.  Last night we threw in some sweet potatoes and ranch style beans w/ bacon on top.  The night before we made 2 pizzas covered with heirloom tomato sauce (from where? the expo!), cheese, tomatoes, eggplant, onions, peppercinis, olives, bell peppers, garlic OMG it was delish.  We actually had some extra dough laying around so we made an impromptu pizza last night as well.  Add to that a fatty salad made with freshly harvested with tomatoes, cucumbers, onions, basil, garlic, balsamic & olive oil - YUM.  

Since we're in the middle of what appears to be a heat wave - it had cooled off for a bit but now we're back to the 100's - we've been eating and preparing our family meals outside on the picnic benches.  The yurt just gets SO hot - and it's no fun to cook or eat in that heat.  There's also a circular cob bench that surrounds a fire pit out there - we threw some wood in there last week (when it was much cooler) and dined around it as the sun went down.  

Wait - let's not forget about dessert.  Mimi made a zucchini crisp - kinda like an apple crisp but with zucchini.  Nutritious and delicious! 

As you can tell, there's no shortage of fresh food around here, and we're so grateful for it.  As I write this, there's a crock-pot of fresh tomato puree on its way to becoming homemade ketchup.  And did I mention all the apple butter Cassie & David made and canned a few weeks ago from tree-ripened apples?  

I wonder what's on the menu tonight ....


Tuesday, September 20, 2011

Solar Dehydrator

Cassie built a very cool device:  a solar dehydrator.


It's made out of reclaimed redwood.  How does it work, you ask?   Well, first you load up the trays with whatever fruit or vegetable you'd like to dehydrate - we're currently drying heirloom tomatoes (we had SO many from the expo.)  The main part of the unit - the rectangular wooden box on the right - opens in the back to reveal various racks that hold vented trays lined with mesh.  Lay the tomatoes on top, place unit in the sun and in a few days (depending on how moist your produce is) you will have sun-dried tomatoes!

Heirloom tomatoes slowly drying

Fresh tomatoes on the tray, about to begin drying

The slanted potion of the dehydrator works to capture heat.  It's plexiglass on top, so it allows the sunlight to enter easily, and below it, the wood is painted black so as to attract as much sun as possible.  The heat is captured in the space between the wood and plexiglass, and moves up (hot air rises) into the main compartment where your produce resides.


So far we've dried apples and zucchini slices.  The heirlooms have another day or so to go, but they're looking good.  We sampled on of the thinner slices that was essentially ready - it was super sweet and almost tasted like an apricot.  Love those heirlooms ;)

Thursday, September 15, 2011

National Heirloom Expo

This week, the very first (annual) National Heirloom Expo took place.  It was held in Santa Rosa at the Sonoma County fairgrounds on Tuesday, Wednesday and Thursday.  David volunteered to coordinate all the volunteers (gulp!) so he's been down there all week.  The rest of the interns came down to help out as well for a day, if not more.

Gourd, anyone?

Gourdgeous

It was a pretty sizable event, and there were many different areas in which to help.  Brandon and I worked in the Chef / Tasting area - we introduced chefs, and cut up heirloom tomatoes and melons for the tasting competition.  That was a pretty fun job. (Three for you, one for me ... )  There were at least 9 different tomato varieties and 4 melons entered into the contest - all unique and delicious, and none that I'd heard of. Others helped out the speakers and worked with the food vendors.  Before and after our duties, we cruised around and checked things out.

Ridiculous

Melons from the tasting competition

There were some incredible displays as well - numerous gardens had been set up for the event all around the fair grounds.  One guy was carving intricate designs into fruit and vegetables turning them into beautiful pieces of art.  At times he even choreographed his work - speeding up and slowing down his carving with the tempo of the music.

The roses you see are actually potatoes


Close up - melon carving

Delicious, organic, all natural food vendors were represented.  You could also buy starts and produce - one stand let you fill up a paper bag with as much produce as you could for $5!  It was an insane deal.  No doubt I left with over $20 worth of fresh, off the vine fruits and veggies.  Lots of heirloom seed vendors, handmade products (baskets, salts, seasonings, olives, aprons, bags, ceramics ... you name it!)  Stage areas for 2 bands, not to mention speakers galore and even films!  I wish I could have gone back today for the speakers alone (and yes, some goats milk ice cream & more rosa bianca eggplants.)


An heirloom expo celebrating local, organic produce & farmers, the slow food movement, farm to table etc. wouldn't be complete without one of it's pioneers: Alice Waters.  She was the keynote speaker Wednesday night - did you know she essentially started farmers markets in the US?  As in, they were not allowed and didn't exist before she personally worked to make that happen.  Such an incredible, inspiring woman.  I was able to pull her away from book signing for a quick pic (well, Brandon did ... I hate bugging celebs) but regardless - we got the pic for the blog.  And Facebook - score!

My hero

Wednesday, September 14, 2011

Staying Cool

Anyone who's lived or spent time near Hopland knows how warm it can get in the summer.  There have been some days in the last couple weeks that have been
H O T.  There's not much in the way of cooling off at SLI aside from popping into the office, Pach, or the Real Goods Store and enjoying some of the benefits of passive solar design.  Otherwise, the best way to cool off up here is to head to the river.  There's a "beach" that's walking distance from the property which we frequent - it's convenient, easy to get to and takes about 10 min to get there.  However, we've tried something new lately - driving down 101 to the various swimming holes to find some even better swim spots.

We weren't quite sure where to go, but we had an idea.  You can generally see people either parked on the side of the road or getting back into their car donning swim suits or the occasional innertube (for floating down the river).  This gave us a few different options to choose from for the first attempt.  

Now, it's not as easy to get to these swim spots as it is to get to the one by SLI - you have to earn your swim hole!  This involves steep, rocky paths laden with poison oak.  It was a bit daunting at first, (especially if you're the one holding a pack of brewskies) but not bad once you got the hang of it.  Side stepping is key.

If there was a temperature exactly opposite the blazing hot heat outside, we found it. The water was ice cold. So cold that it's hard to get used to - you have to really work at it, thought it still it feels amazing once you get out.  The best is swimming to a massive rock in the sun, climbing it, and laying out to warm up after you effectively froze your butt off.

Brandon & Eric - the brave first 2 in the water, racing to the rock

We've only tried this once but we'd like to make it a weekly thing, trying new spots each time.  Perhaps we'll find the most epic swim holes even the locals don't know about .... then we'll draw up a treasure map of sorts to pass on to the new crew of interns .... I smell a new project.

Tuesday, August 30, 2011

Welcome Parducci!

It's official.  Parducci winery has opened up a tasting room right in middle of the Solar Living Center - inside the Real Goods store to be exact.  How perfect is that!?  The first carbon neutral winery in the US pouring in the greenest store on earth?  That's a match made in heaven.

Wine tasting is that-a-way --->

The tasting room officially opened this past Saturday.  The cost is $5 for a flight of 4 wines. You choose the wines you'd like to try from their tasting menu, which includes a nice mix of various reds and whites.  The tasting fee is waived if you purchase 2 bottles or if you're a club member. Cool beans.

Ross, our Executive Director getting his taste on

Stop by for a taste!  They open with The Real Goods Store at 10am ... but if that's too early for you to start imbibing (hey, that's 5pm in the Azores), they pour all day until 5pm - our time.

Thursday, August 25, 2011

Mr. Tough Guy

A number of weeks ago we received 3 new chickens and a rooster.  Our chicken population had been dwindling - many of our birds caught some sort of  terminal respiratory virus, and we were down to only one. Luckily someone answered our Facebook post and we're back to a solid brood.  The chickens are finally laying now too which is great - we went through a dry egg spell for quite a while.  It's no fun buying eggs when you keep your own chickens.  But this post isn't about chickens, or their eggs.  It's about the rooster.  And he is definitely a cock.

Step off.


Now, this may be typical, and I'm told that it is ... but our rooster is kind of a punk.  When you walk by him and his harem, the lady birds will move out of your way, but he just flaps his wings, even takes a step forward  as if to say "get off my path!"  If you walk towards him directly, he'll flap his wings, make some throaty rooster sounds, and wait till the very last minute before he steps away from you (only because now you really are too close to him - and let's face it, you're much bigger).  But as soon as you move back and give him space, he steps towards you as if to say "yeah that's right ... keep moving."  He likes to get the last "step" if you will. 

You can find many an intern messing with him, as a result.  All very playful of course ... we'll walk behind him with increasing speed and intensity and see how long it takes before he actually runs away.  Though, I've tried  this - and he turned and lunged at me!  He's lunged at others too - clearly, he's on to our games.  Last week, as I was walking behind him a bit too close for a bit to long, he quickly turned around, flapped his wings, few up into the air waist-high, froze Matrix style, did a 360 and scratched my legs on his way back down.  I kid you not.  I chased him down the path after pulling a stunt like that.  It's the Intern Village, not Rooster Row.

For being so sassy he's actually quite handsome.  Cassie and I have been eying the teal feathers in his tail - they'd make lovely earnings.  Just sayin. ;)

Friday, August 12, 2011

Natural Building Intensive: Final Days of Dirt

It's getting down to the wire. 2 days to go and on our to-do list:

- design and build the stained glass wall
- fill in sides of front wall
- plaster
- take a shower


Before we could plaster up the front, we had to fill it with earth, but more importantly, we used a natural building technique that incorporated glass bottles to give the effect of stained glass. You can use any bottles - we used old wine and spirit bottles (patron tequila bottles are the best, ps). Brittany and Eric designed a spiral pattern. They outlined their design on a piece of plywood that was temporarily fixed to the exterior of the wall. On the interior, they fastened a wire mesh wall, into which the bottles would be attached with pieces of wire.

Britt adding the bottles to mesh wire

Final design, ready for clay


Once the bottles were snugly wired in, we filled in the area surrounding the bottles with straw clay. Next, we cut out the wire in front of each bottle and removed it (after taking down the plywood). Now, the bottles were fully exposed in the spiral pattern, magically suspended between the clay mix! Make a few adjustments here and there to refine the shaping around the bottles, and you have a gorgeous handmade glass design within your wall. I love this feature of natural building; It ads such a personalized, unique artsy touch.


Moving right along ... to the left and right of the bottle design, we built 2 "quick and dirty" walls. On the outsides of the frames we stapled a reed mat, leaving an opening at the top. Into that opening, we poured wood shavings (the owner of the property mills his own wood, so these were the byproduct of his effort) tossed with clay silt. This filling was somewhat fluffy; it kinda reminded me of popcorn slathered in butter. We poured that mixture into the wall, nailed it shut and it was the ready to be plastered.


Last but not least: Plaster. This is the layer you put on the outside of the walls you just filled, in order to make it look really nice (and insulate, protect it, etc). We used a mix of, you guessed it, straw, clay dirt, straw and sand. It had a more goopy texture so you could just palm it onto the back of the wall, let it stick, then smoothe in the edges so it blended altogether. Once there was enough on to cover it uniformly, we used a trowel to smoothe the surface. We did this to the back wall, inside and out of the clay waddle wall, as well as on the outside of the front wall (the last wall & roof will be completed at a later date.)

The back side fully plastered. (Brandon contemplates.)
 This is as far as we got building the composting toilet structure over our 5 day course. Not too shabby for beginners! That afternoon, we opted to visit Massey's place. She and her 3 roommates (all natural builders) share a piece of property. Initially, it consisted of a main house and a large garden out back; however, they're in the process of building their own individual "pods" along side the garden. These pods are naturally built, personally designed bedrooms. It was pretty amazing to see their works in progress, some of which were already completed and lived in. We spent the afternoon here, helping out where we could and working on the floor of Massey's pod. We chose to do this over working more on the toilet. Can you blame us?

One of the pods on Massey's property
Inside - check out the inset shelving & bamboo ceiling detail

Massey's brain child

The last pod in the row
Inside the last one - large bamboo exposed in the ceiling
And now, for the final to-do:  SHOWER! ;)

Thursday, August 11, 2011

Natural Building Intensive: Days 2-3 of Dirt

On the second day, we learned two natural building techniques: wattle and daub & clay wattle.  Wattle is basically weaving thin branches horizontally around larger vertical pieces.  In our case, the thin branches we used were pieces of split bamboo, and the vertical piece was a whole bamboo reed.  There was a bunch of it growing on the property, and much of it had already been cut and dried, so it worked out perfectly. 

Bamboo wattle
Before we could start any form of wattle, we had to finish building the timber frames.  The frames were built using 2 by 4's, into which we put 3 vertical bamboo rods. For the side wall, instead of weaving small pieces of bamboo through vertical bamboo (wattle & daub), we wove a mixture of clay and straw (clay wattle).  To do so, we rolled the thick mixture into ~12 inch long "snakes", and wrapped it around the bamboo pole, blending it back into the clay below and beside it.  Rinse and repeat.  In no time you'll have a new wall. 


Brittany & Brandon getting their wattle on


Wrapping the clay straw around the bamboo

Here's the back wall frame we built.  The split bamboo will be woven around the 3 vertical bamboo rods on each side.

Working hard on the frame


The middle section (where Brandon is standing) will be filled with the adobe bricks we made the day before - but not before they fully dried.  To ensure fast and proper trying, one of the first things we did on day 2 was flip and trim the bricks.  We turned them on their side to help them dry faster and trimmed their edges so they were more fully rectangular.


our 100 or so adobe bricks drying in the sun
 
The bamboo used for the wattle was split into 4's using a pretty handy tool: Bamboo Splitter. I don't know the official name - but it's Japanese and it splits bamboo. If you're interested in a live demo, check out Eric on YouTube.

bamboo splitter
Once split into 4's, the bamboo pieces were cleaned with a knife (to smoothe the rough edges) and cut into smaller pieces with a saw to fit horizontally around the full, vertical bamboo pieces. 

Cassie weaving wattle in the back wall.  Looking good huh!?
Once we put the back wall up, wove all the wattle, it was time for the daub.  We used a mixture of cut straw, clay, sand and water to make the daub; it was essentially a type of plaster.  To apply, simply slather it on from the outside and push it through the cracks of the bamboo so it sticks, creating a more sturdy wall. 


Because the bamboo was so pretty, we opted not to put daub on the inside walls, but rather to leave the bamboo exposed.  But we did clean it up before it dried so that it wasn't "goopy" looking.

Next, we laid adobe bricks.  Between each brick we put a layer of mortar (sand, clay, water) making sure it was level.  For mis-sized bricks, we'd chisel it back into form.

Brick wall close up

We've also got some video footage of the brick laying:


Up next ... the final touches: spiral bottle design, "quick and dirty" front walls and plastering the whole thing.  Watch it all come together ....